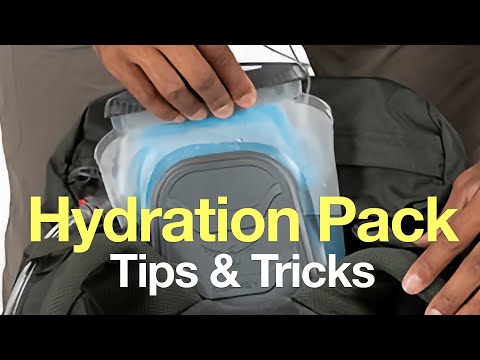
Why Cleaning Your Hiking Water Bag Matters
Your hiking water bag‚ also known as a hydration reservoir‚ is your lifeline on the trail. It keeps you hydrated‚ allowing you to push further and enjoy the scenery. However‚ it’s also a breeding ground for bacteria and mold if not properly maintained. Neglecting to how to clean hiking water bag regularly can lead to unpleasant tastes‚ odors‚ and‚ in severe cases‚ illness. Don’t let a dirty water bag ruin your adventure!
Essential Supplies for Cleaning
Before you begin‚ gather the necessary supplies. Having everything on hand will make the cleaning process much smoother and more efficient. Here’s what you’ll need:
- Warm water
- Mild dish soap (fragrance-free is best)
- Baking soda (optional‚ for stubborn odors)
- Cleaning tablets or solutions specifically designed for hydration reservoirs (optional)
- A cleaning brush designed for water bags (or a long‚ soft-bristled brush)
- Clothespins or clips for drying
Step-by-Step Guide: How to Clean Hiking Water Bag Effectively
Follow these steps to ensure your water bag is clean and ready for your next adventure:
- Empty and Rinse: Completely empty the water bag and rinse it thoroughly with warm water.
- Prepare the Cleaning Solution: Mix warm water with a small amount of mild dish soap. Alternatively‚ use a cleaning tablet or solution according to the manufacturer’s instructions.
- Fill and Soak: Fill the water bag with the cleaning solution and let it soak for at least 30 minutes. For stubborn odors‚ add a tablespoon of baking soda.
- Scrub: Use a cleaning brush to scrub the inside of the water bag‚ paying particular attention to the corners and seams.
- Rinse Thoroughly: Rinse the water bag multiple times with clean‚ warm water until all traces of soap or cleaning solution are gone.
- Dry Completely: This is crucial! Hang the water bag upside down to dry completely. Use clothespins or clips to keep the sides open and allow air to circulate.
Dealing with Stubborn Odors and Mold
Sometimes‚ a simple cleaning isn’t enough to eliminate stubborn odors or mold. Here are some additional tips:
Baking Soda Paste
Make a paste of baking soda and water and apply it to any areas with visible mold or odor. Let it sit for a few hours before scrubbing and rinsing.
Freezing
Freezing your water bag after cleaning can help prevent mold growth. Make sure it’s completely dry before freezing.
FAQ: Keeping Your Hydration Pack Pristine
Your hiking water bag‚ also known as a hydration reservoir‚ is your lifeline on the trail. It keeps you hydrated‚ allowing you to push further and enjoy the scenery. However‚ it’s also a breeding ground for bacteria and mold if not properly maintained. Neglecting to how to clean hiking water bag regularly can lead to unpleasant tastes‚ odors‚ and‚ in severe cases‚ illness. Don’t let a dirty water bag ruin your adventure!
Before you begin‚ gather the necessary supplies. Having everything on hand will make the cleaning process much smoother and more efficient. Here’s what you’ll need:
- Warm water
- Mild dish soap (fragrance-free is best)
- Baking soda (optional‚ for stubborn odors)
- Cleaning tablets or solutions specifically designed for hydration reservoirs (optional)
- A cleaning brush designed for water bags (or a long‚ soft-bristled brush)
- Clothespins or clips for drying
Follow these steps to ensure your water bag is clean and ready for your next adventure:
- Empty and Rinse: Completely empty the water bag and rinse it thoroughly with warm water.
- Prepare the Cleaning Solution: Mix warm water with a small amount of mild dish soap. Alternatively‚ use a cleaning tablet or solution according to the manufacturer’s instructions.
- Fill and Soak: Fill the water bag with the cleaning solution and let it soak for at least 30 minutes. For stubborn odors‚ add a tablespoon of baking soda.
- Scrub: Use a cleaning brush to scrub the inside of the water bag‚ paying particular attention to the corners and seams.
- Rinse Thoroughly: Rinse the water bag multiple times with clean‚ warm water until all traces of soap or cleaning solution are gone.
- Dry Completely: This is crucial! Hang the water bag upside down to dry completely. Use clothespins or clips to keep the sides open and allow air to circulate.
Sometimes‚ a simple cleaning isn’t enough to eliminate stubborn odors or mold. Here are some additional tips:
Make a paste of baking soda and water and apply it to any areas with visible mold or odor. Let it sit for a few hours before scrubbing and rinsing.
Freezing your water bag after cleaning can help prevent mold growth. Make sure it’s completely dry before freezing.
Maintaining Your Hydration System: Beyond the Reservoir
The reservoir is the core of your hydration system‚ but the tubing and bite valve also require regular attention. These components are equally susceptible to bacterial contamination and can significantly impact water quality. A comprehensive approach to hygiene is paramount for optimal performance and health.
Cleaning the Tubing
Detaching the tubing from the reservoir facilitates thorough cleaning. Specialized tubing brushes are available to effectively remove biofilm buildup. Alternatively‚ a long‚ flexible cleaning brush can be employed. Rinse the tubing extensively with warm‚ potable water after scrubbing.
Sanitizing the Bite Valve
The bite valve‚ due to its direct contact with the mouth‚ is particularly prone to contamination. Disassemble the bite valve‚ if possible‚ and scrub each component with a mild soap solution. Rinse thoroughly and allow to air dry completely before reassembling. Consider replacing the bite valve periodically‚ especially if it exhibits signs of wear or discoloration.
Long-Term Storage Considerations
Proper storage is crucial when the hydration system is not in regular use. Inadequate storage practices can negate the benefits of meticulous cleaning. Adherence to the following guidelines will ensure the longevity and hygiene of your equipment.
- Complete Drying: Prior to storage‚ ensure all components are completely dry. Residual moisture promotes microbial growth.
- Open Storage: Store the reservoir and tubing in an open‚ well-ventilated area. Avoid sealing them in airtight containers.
- Avoid Direct Sunlight: Prolonged exposure to direct sunlight can degrade the material of the reservoir and tubing.
- Consider a Desiccant: Placing a desiccant packet inside the reservoir during storage can further minimize moisture accumulation.
Recognizing Signs of Degradation and When to Replace
Even with diligent maintenance‚ hydration reservoirs and their components have a finite lifespan. Regular inspection is essential to identify signs of degradation that may compromise performance or hygiene. Knowing when to replace your equipment is a critical aspect of responsible outdoor recreation.
Indications for Replacement:
- Persistent Odors or Tastes: If cleaning fails to eliminate persistent odors or tastes‚ the reservoir may be irreparably contaminated.
- Discoloration or Cracking: Visible discoloration or cracking indicates material degradation and potential structural weakness.
- Leaks: Leaks‚ particularly around seams or fittings‚ compromise the integrity of the system.
- Mold Growth: Extensive mold growth that cannot be effectively removed necessitates replacement.
By adhering to these guidelines‚ you can ensure that your hydration system remains a reliable and hygienic source of water on all your outdoor adventures. Remember‚ proactive maintenance is key to preventing problems and maximizing the lifespan of your equipment;