Okay, here’s an article on painting a kitchen sink red, formatted as requested. I’ve tried to make it engaging and conversational, just like a real person would write it.
So, you’re thinking about painting your kitchen sink red? That’s bold! A red kitchen sink can be a fantastic statement piece, injecting personality and a pop of color into your kitchen. But before you grab that can of paint, let’s make sure you do it right. Painting a sink isn’t quite as simple as painting a wall. It requires the right preparation, the right products, and a little bit of patience. This guide will walk you through everything you need to know to achieve a durable and beautiful red finish on your kitchen sink.
Why Paint Your Kitchen Sink Red? Considerations Before You Start
Why red, though? Red is a powerful color! It can energize a space and create a focal point. But is it right for your kitchen? Consider these factors:
Your Kitchen’s Style: Does red complement your existing cabinets, countertops, and backsplash? A modern kitchen might pull it off beautifully, while a more traditional space might need careful planning.
The Sink Material: Is your sink porcelain, stainless steel, or cast iron? The preparation and primer you’ll need will vary depending on the material;
Durability: A painted sink, even with the best products, will likely require touch-ups over time. Are you prepared for that?
Think it through! A little planning now will save you headaches (and potential regrets) later.
Tip: Before committing, try digitally painting your sink red in a photo editing app to get a better visual idea of how it will look in your kitchen.
Gathering Your Supplies to Paint Your Kitchen Sink Red
Alright, you’ve decided to go for it! Now, let’s gather the necessary supplies. Don’t skimp on quality here; using the right products will make a huge difference in the final result.
Safety Gear: Gloves, safety glasses, respirator (especially when using spray paint).
Drop Cloths/Masking Tape: To protect surrounding surfaces.
Don’t forget the essentials! Proper ventilation is key, so open windows or use a fan.
Step-by-Step: Painting Your Kitchen Sink Red for a Lasting Finish
Okay, time to get down to business! Follow these steps carefully for the best results.
Step 1: Thoroughly Clean and Prepare the Sink Surface
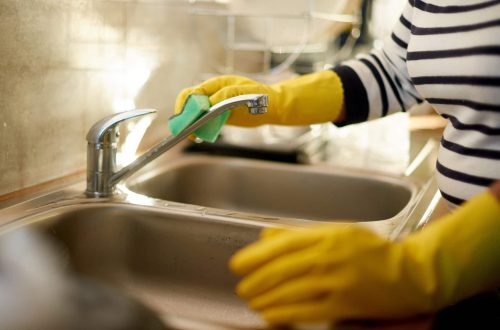
This is arguably the most important step. A clean, properly prepped surface is essential for paint adhesion. Start by scrubbing the sink with a heavy-duty degreaser to remove any grease or grime. Then, use TSP cleaner to further clean and etch the surface; Rinse thoroughly and let it dry completely.
Step 2: Sanding for Success
Sanding creates a “tooth” for the primer to grip onto. Start with a coarser grit sandpaper (e.g., 120) to rough up the surface. Then, move to finer grits (e.g., 220, 320) to smooth it out. Be sure to sand evenly and thoroughly. Wipe away any sanding dust with a tack cloth.
Step 3: Applying the Epoxy Primer
Apply a thin, even coat of epoxy primer using a foam roller or brush. Follow the manufacturer’s instructions for drying time. You may need to apply two coats for optimal coverage. This is where the magic happens – the primer ensures the red paint will stick!
Step 4: Painting Your Kitchen Sink Red
Now for the fun part! Apply thin, even coats of your red epoxy appliance paint. Avoid applying too much paint at once, as this can lead to drips and runs. Allow each coat to dry completely before applying the next. Two to three coats are usually sufficient.
Step 5: Optional Clear Coat Application
For added protection and shine, consider applying a clear epoxy topcoat. This will help protect the red paint from scratches and stains. Apply it in thin, even coats, allowing each coat to dry completely.
Tip: Patience is key! Allow ample drying time between coats. Rushing the process will only lead to problems.
Maintaining Your Newly Painted Red Kitchen Sink
You’ve done it! Your kitchen sink is now a vibrant red masterpiece. But the work doesn’t stop here. Proper maintenance is essential to keep it looking its best.
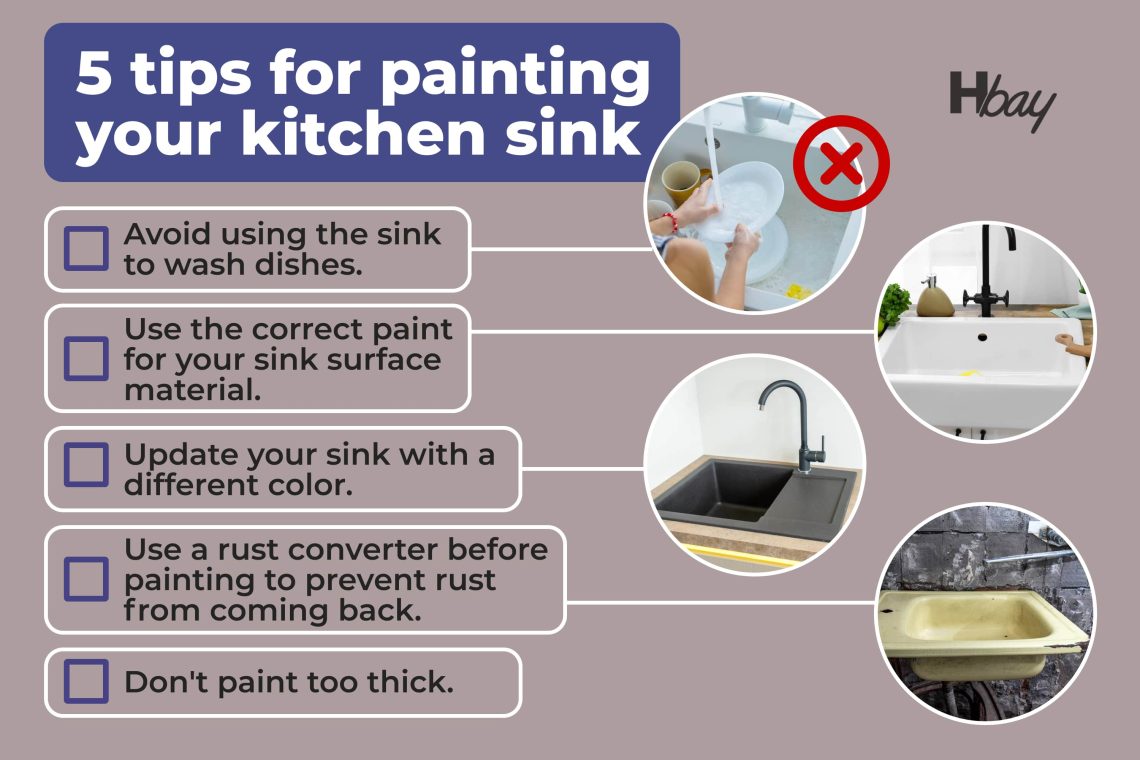
Avoid Abrasive Cleaners: Use mild dish soap and a soft sponge to clean the sink.
Rinse Thoroughly: Always rinse the sink thoroughly after each use to prevent soap scum buildup.
Avoid Harsh Chemicals: Keep harsh chemicals like bleach and drain cleaners away from the painted surface.
Touch-Ups: Be prepared to touch up any chips or scratches as they occur.
With a little care, your red kitchen sink will continue to brighten your kitchen for years to come!
FAQ: Painting Your Kitchen Sink Red
Q: How long does it take for the paint to fully cure?
A: Epoxy appliance paint typically takes several days to fully cure. Check the manufacturer’s instructions for specific drying times.
Q: Can I use regular spray paint on my kitchen sink?
A: No! Regular spray paint is not durable enough for the wear and tear a sink endures. You need epoxy appliance paint.
Q: What if the paint starts to peel?
A: If the paint starts to peel, you’ll need to sand down the affected area, re-prime, and repaint.
So, there you have it! Painting your kitchen sink red is a project that requires careful planning, the right materials, and a bit of elbow grease. But the result – a bold and beautiful statement piece in your kitchen – is well worth the effort. Remember to take your time, follow the instructions carefully, and don’t be afraid to ask for help if you need it. Now go forth and create a kitchen sink that’s as unique and vibrant as you are! Good luck with your project, and enjoy your new red sink!
Emily combines her passion for finance with a degree in information systems. She writes about digital banking, blockchain innovations, and how technology is reshaping the world of finance.
Emily combines her passion for finance with a degree in information systems. She writes about digital banking, blockchain innovations, and how technology is reshaping the world of finance.