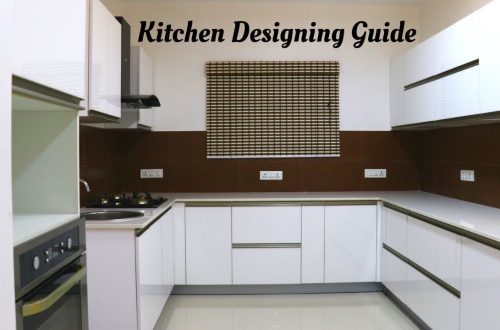
Dreaming of a kitchen that’s both functional and beautiful? A space that perfectly reflects your style and meets your needs? AutoCAD can be your secret weapon! It might seem daunting at first, but with a little guidance, you can use this powerful software to design the kitchen you’ve always wanted. This guide will break down the process into manageable steps, so you can confidently create a kitchen design that’s both practical and visually stunning. Ready to transform your kitchen dreams into a reality? Let’s get started!
Planning Your Kitchen Design in AutoCAD
Before you even open AutoCAD, take some time to plan. What are your needs? What’s your style? A little preparation goes a long way in ensuring a successful design.
Gathering Measurements for Your AutoCAD Kitchen Design
Accuracy is key! Measure the existing kitchen space carefully. Include:
- Wall lengths
- Window and door positions and sizes
- Ceiling height
- Location of plumbing and electrical outlets
Don’t just eyeball it! Get precise measurements. Trust me, you’ll thank yourself later.
Defining Your Kitchen Layout in AutoCAD
Consider different kitchen layouts: L-shaped, U-shaped, galley, or island. Which one best suits your space and needs? Think about the “work triangle” – the relationship between the sink, stove, and refrigerator. Optimizing this triangle can significantly improve kitchen efficiency.
Tip: Sketch out a few different layout options on paper before committing to one in AutoCAD. This helps you visualize the possibilities and identify potential problems early on.
Setting Up AutoCAD for Kitchen Design
Now it’s time to get your hands dirty (virtually, of course!). Setting up AutoCAD correctly will make the design process much smoother.
Creating a New AutoCAD Drawing for Your Kitchen
Start a new drawing in AutoCAD. Choose a template that uses architectural units (inches or millimeters, depending on your preference). This will ensure that your measurements are accurate and consistent.
Setting Up Layers in AutoCAD for Kitchen Elements
Layers are your best friend! Organize your drawing by creating separate layers for:
- Walls
- Windows and doors
- Appliances
- Cabinets
- Plumbing
- Electrical
This makes it easier to edit and manage different elements of your design. Think of it like having separate sheets of tracing paper for each component.
Defining Units and Scale in AutoCAD for Kitchen Design
Make sure your units are set correctly (e.g., inches or millimeters). Choose a scale that allows you to work comfortably within the drawing area. A common scale for kitchen design is 1/4″ = 1′ (or 1:50 in metric).
Drawing the Kitchen Structure in AutoCAD
Time to build the foundation of your kitchen in AutoCAD. This involves drawing the walls, windows, and doors.
Drawing Walls, Windows, and Doors in AutoCAD
Use the LINE command to draw the walls according to your measurements. Remember to accurately represent the thickness of the walls. Use the appropriate commands (e.g., ARC, CIRCLE) to create window and door openings.
Interesting Fact: Did you know that AutoCAD has dynamic input features that allow you to directly enter measurements while drawing lines? This can significantly speed up the process!
Adding Architectural Details in AutoCAD
Consider adding details like baseboards, crown molding, or window trim. These small touches can make a big difference in the overall look and feel of your kitchen design.
Adding Kitchen Components in AutoCAD
Now for the fun part! Adding the appliances, cabinets, and other essential kitchen components.
Inserting Appliances and Fixtures in AutoCAD
AutoCAD has a library of pre-drawn blocks for common appliances like refrigerators, stoves, and dishwashers. You can also download blocks from online resources. Make sure to position them accurately according to your layout plan.
Designing and Placing Cabinets in AutoCAD
Draw the cabinets using the LINE, RECTANGLE, and OFFSET commands. Consider different cabinet styles and configurations. Think about storage needs and accessibility when designing your cabinet layout.
Adding Plumbing and Electrical Fixtures in AutoCAD
Indicate the location of plumbing fixtures (sink, faucet) and electrical outlets. This is crucial for ensuring that your kitchen is functional and meets building codes.
Adding Details and Finishing Touches to Your AutoCAD Kitchen Design
It’s the little things that make a big difference. Adding details like countertops, backsplashes, and lighting can really bring your kitchen design to life.
Adding Countertops and Backsplashes in AutoCAD
Draw the countertops using the POLYLINE command. Consider different countertop materials and edge profiles. Add a backsplash using the HATCH command or by drawing individual tiles.
Adding Lighting Fixtures in AutoCAD
Plan your lighting carefully; Consider ambient lighting, task lighting, and accent lighting. Add lighting fixtures to your drawing to indicate their location and type.
Adding Dimensions and Annotations in AutoCAD
Add dimensions to your drawing to clearly indicate the size and location of different elements. Use annotations to add notes and labels. This will make it easier for contractors to understand your design.
FAQ: Designing Your Kitchen with AutoCAD
Is AutoCAD difficult to learn for kitchen design?
AutoCAD has a learning curve, but with practice and tutorials, it’s manageable. Start with basic commands and gradually learn more advanced features.
Where can I find free AutoCAD blocks for kitchen appliances?
Many websites offer free AutoCAD blocks. Search for “free AutoCAD blocks kitchen appliances” on Google.
What are the benefits of using AutoCAD for kitchen design?
Accuracy, flexibility, and the ability to visualize your design in 2D or 3D are key benefits.
Designing your kitchen with AutoCAD can be a rewarding experience. It allows you to create a space that is perfectly tailored to your needs and style. Don’t be afraid to experiment and try new things. Remember, the most important thing is to have fun and create a kitchen that you’ll love for years to come. So, grab your mouse and keyboard, and start designing your dream kitchen today! You might be surprised at what you can achieve. Happy designing!


