Home Improvement

Creating a Temporary Kitchen Sink: Practical Solutions and Ideas

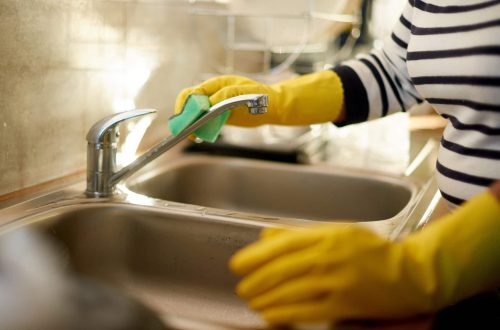
Renovating your kitchen? Dealing with a plumbing emergency? Or maybe you’re setting up an outdoor cooking space? Whatever the reason, sometimes you just need a temporary kitchen sink solution․ Let’s face it, washing dishes in the bathtub or lugging water outside is a real pain․ But don’t worry, creating a functional temporary sink is easier than you might think! This article will guide you through the process, offering some practical and creative solutions to get you washing dishes like a pro, even when your regular sink is out of commission․ We’ll explore different options, from simple setups to slightly more elaborate ones, ensuring you find the perfect fit for your needs and budget․

Creating a Basic Temporary Kitchen Sink

Let’s start with the simplest approach․ This is perfect if you need a quick and dirty solution for a short period․ Think of it as the “emergency sink” option․

Materials for Your Basic Temporary Kitchen Sink

  • A sturdy plastic tub or container (think large storage bin)
  • A water source (hose, faucet adapter, etc․)
  • A bucket or container for wastewater
  • Dish soap, sponge, and towels

Here’s the process: Place the tub on a stable surface․ Position the wastewater bucket below the tub to catch the draining water․ Connect your water source to the tub, ensuring it’s a controlled flow․ And that’s it! You’ve got a basic temporary sink․

Pro Tip: Line the bottom of the tub with a rubber mat to prevent dishes from slipping and breaking․

It’s not fancy, but it gets the job done! Remember to empty the wastewater bucket frequently to avoid overflows․

Setting Up a More Functional Temporary Kitchen Sink

Want something a little more robust and user-friendly? This option involves a bit more setup but offers improved convenience and functionality․ Think of it as a “temporary upgrade” to your basic sink․

Using a Utility Sink for a Temporary Kitchen Sink

A utility sink is a fantastic option․ They’re designed for washing and cleaning, making them ideal for temporary kitchen duty․ You can often find them at home improvement stores․

  • Utility sink (portable or stationary)
  • Faucet (if not included with the sink)
  • Water supply hoses
  • Drainage hose and adapter
  • Bucket or drain connection

Installation: Connect the faucet to the sink․ Attach the water supply hoses to your water source and the faucet․ Run the drainage hose to a bucket or, ideally, connect it to an existing drain line using an adapter․ Secure all connections to prevent leaks․

This setup provides a more comfortable washing experience and easier drainage․ Plus, many utility sinks come with built-in backsplashes, which is a nice bonus!

Interesting Fact: Did you know that some portable utility sinks come with built-in water heaters? Talk about convenience!

Addressing Drainage for Your Temporary Kitchen Sink

Proper drainage is crucial for any temporary sink setup․ Nobody wants a flooded kitchen! So, how do you handle the wastewater?

Temporary Kitchen Sink Drainage Options

  • Bucket Method: The simplest option․ Just make sure the bucket is large enough and empty it frequently․
  • Drain Hose to Existing Drain: Use a hose and adapter to connect your temporary sink’s drain to an existing drain line (like a washing machine drain)․ This is the most convenient option, but requires careful fitting․
  • Outdoor Drainage: If you’re using the sink outdoors, you can drain the water into a designated area away from your house․ Be mindful of local regulations regarding wastewater disposal․

No matter which method you choose, always double-check for leaks! A little prevention goes a long way․